
As you might have noticed, I have become a bit fixated lately on how bolted joints work. And now I understand more about the subject (thanks Eric and Matt) I see poorly put-together ones everywhere I look.
This would be bad enough if it was limited to stupid stuff I have done in my 60 years of fixing boats, or even dumb stuff I see in boatyards, but, sadly, that’s not the case.
I would bet that a significant number of the gear failures, and a huge percentage of the leaks on boats are because the builder completed a bolted joint poorly. And that sucks when we consider that it’s bolted joints that hold fin keels on, and most every fitting on the deck and many on the rig.
While I would guess the most common bolted joint sin among yachties, yards, and builders is not using a properly calibrated torque wrench every time a bolted joint is put together, as well as checking the torque at least a couple of times afterward to take up creep, there’s another error that I have found in a couple of places on our J/109 that I suspect is all too common:
This one made me chuckle. We bought a J/80 several years ago and one day I noted rust stains running off one of the rudder pintles. I removed the pintle and discovered that Duffus mis-drilled the holes in the wrong location. He re-drilled new holes but he left the mis-drilled holes there (with no filler or even caulk to fill them), his mistake covered up by the pintle. I epoxied solid carbon rods into the open mis-drilled holes and buttoned it all back up, no problems going forward from there.
Nice job. I did this recently to some hardware on a cored part of the deck. I feel like there is an important difference in that case… Having over drilled and epoxied the holes through the deck I DIDN’T epoxy the backer plate to the underside of the deck for two reasons. Firstly I figured that I would like to see and know about any water getting past the butyl and down the holes, rather than having it stay in there. Secondly I wanted all the compression on the epoxy sleeves and not on the surrounding cored deck. Trickier to get perfectly parallel though!
Hi Pete,
I would still epoxy the plate on to get it parallel. Assuming the plate is stiff enough whether of not any compression is transferred to the core won’t change since that’s governed by the whether or not the areas with core removed are stiff enough not to compress more than the core under the bolt tension. Also, if it leaks around the bolts I can’t see a difference in detecting that with the plate bonded, at least as long as the potting of the bolts is done right.
There’s also another benefit to bonding the plate, which I will cover in another tip.
Yeah fair enough. I’ll think about it some more whenever I do the next one.
I use structural washers aka heavy washers, under all high load nuts such as genoa sheet foot / turning block bases when securing to GRP. They look like thick penny washers. A standard penny washer can deform under high loads, even on a flat surface, and cup reducing the total surface area. They are easily obtainable and the thickness is specified by the bolt diameter e.g. M10 is 4mm thick x 25 mm OD. I had exactly the same issue as you but scalloped out the thicker step on the underside of the deck.
Hi Alastair,
I agree. The whole subject of washers is really interesting and that’s one of the future tips I’m working on.
G-10 backing plates are the best!
My method is slightly different:
1. Use hole saw to drill oversized holes.
2. Epoxy bond G10 backing plate. The backing plate will usually stay in place by itself while hardening if epoxy is thickened to peanut butter consistency with a 404 and colloidal silica blend. Duct tape can add support if needed. If necessary to ensure plate is parallel, measure depth from outside with marked toothpicks. Let epoxy cure.
3. Wet out inside of hole with neat epoxy and fill with 404 thickened epoxy. Let cure. Use syringe to apply thickened epoxy, starting fill from bottom of hole and pulling out as you fill to avoid gaps. (If wood cored, perform when temps are falling to avoid offgassing.)
4. Extra credit: Epoxy bond a G10 mounting plate on the outside surface, painted for UV protection.
5. Drill correct sized holes. Use countersink bit to bevel outside of hole—increases surface area for sealant.
6. Bed machine screws with good quality butyl tape. Butyl is cheap, permanently flexible, and easy to use—no mess. Not to be used where contact with petroleum products is possible.
The drill-fill-drill routine is essential for cored laminates but I also use it for any substrate. The 404-thickened annulus provides extra compression resistance and permanent waterproofing protection for the core and/or the colloidal silica thickener.
Hi Earl,
While I agree that core materials must be removed, I don’t see any benefit in over drilling and filling when dealing with a non cored area, as I was. Whether or not the deck compresses is a function of the area and stiffness of the backer plate (and washers) in relation to the yield of the deck under compression. I have run this through a bolt joint calculator and generaly found that GRP laminate is just fine in this regard with a typical safety margin of at least 300%.
And if the epoxy with 404 is in fact stiffer than the deck laminate (I would guess it is) potting will result in most all the compression being distributed over a relatively small area as against not potting so the PSI may be a lot higher. Again, this depends on the stiffness of the backer and the fitting.
And if we drill through like that we lose the continuity of the fibres running through the joint. Not sure how significant that is, but I would rather leave them in place when there is no downside. This is also why I leave the underside of the deck in place and just remove the core, when potting bolts.
I also have a hard time seeing how tooth picks and tape would get the plate as accurately parallel as my method using sheet metal screws.
I would also not mix in colloidal silica but rather use 404 alone since it’s specifically designed for areas of high compression.
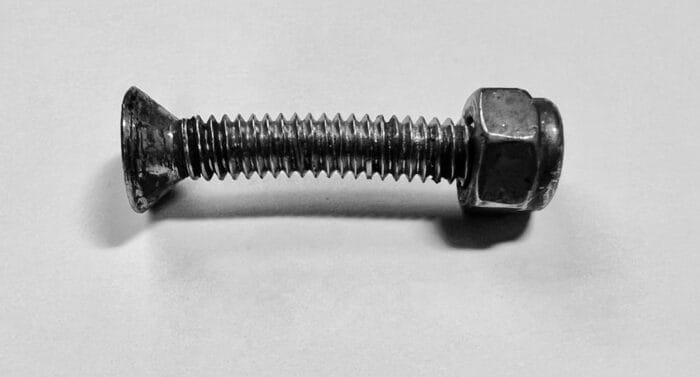
Yup, I have seen a lot of bent bolts.
Another pet peeve of mine is fender washers. They were originally designed to mount fenders on cars, and thus were thin and flexible. I think most of those I remove are bent into cone shapes. Backing plates are best, but Fender washers can work if the layoup is suffiient, the load not too high, and the washers must be extra thick fender washers, available from many sources. They are twice the thickness, 4 times the strength, and 8 times the stiffness. You would need 8 normal fender washers to do the same job. Personally, I think it is a crime that chandleries even sell them, since IMO, normal thickness fender washers really have no purpose on a boat. You either need double thickness fender washer to spread the load, or a regular washer will do because the surface is strong and load does not need spread.
Don’t use a stainless bolt to draw the joint together more than a very short distance (a few turns). Use either a clamp or a non-stainless bolt you will then replace. Stainl3ss loves to gall under load, the reason turnbuckles always have bronze bearing threads. Lubricant and turning very slowly so that heat can dissipate (a half turn, then wait a few seconds, and then a turn, and so forth, depending on the size and load).
Seacocks are an advanced and important case. The inside backer must be parallel to the outside, which it very likely is not as you near the keel. If they are not parallel the chances of a leak over the years go way up. Although there are many solutions, one is to drill the guide hole (1/4-inch) from outside as square as possible, and then use a long blot through that as a guide as you sculpt the backer parallel. Yes, often the first hole is drilled from inside, because that is how you know where the fitting goes. That hole can be drilled ~ 1/2-inch to one side, since it does not need to be the true center, only a reference point. This reference hole will disappear when you drill the larger hole. The backing plate will also be bonded before drilling the final hole, further perfecting the fit. But that does not solve the squareness problem.
Thanks for this. I finally know why at least half the bolts holding the old teak cap rail on my 60 year old Alberg 35 were bent when I removed them to replace the rail. I thought maybe the Pearson plant did it on purpose!
Hi Paul,
Yes, that’s a common one I have often seen. Loverly boat though. My first boat with a cabin was a Sea Sprite 23 by Alberg.
I am installing a plinth under a windlass to get the right angle from the windlass to the bow roller. If I form a “wedge” 1” aft and 1 3/4” forward the bolts that screw into the windlass base will pass through the deck at that angle. A backing plate, to carry through the stress, would have to be similarly wedge shaped, or perhaps a thick piece of G-10 could be drilled with a spade bit in order to provide a place for a washer to sit flat against the nut. Any thoughts?
Hi Nick,
Not just thoughts, step by step guides: https://www.morganscloud.com/2022/12/23/gear-leveling-and-mounting-hack/
Note that the west system guide is wrong, as I state in the caption, so you will need to make two wedges to get this right.
This chapter will help too: https://www.morganscloud.com/2024/03/28/deck-hardware-mounting-photo-essay/
Hi Nick and John,
There is one additional method in addition to the one John lays out that I know of which can make sense in certain circumstances. This works when the plinth is sufficiently mechanically strong to take not just compression and a little shear but also bending moments.
The difference here is that you don’t thru bolt through the plinth, it actually becomes an attachment piece. To attach the deck hardware to it, you either tap the plinth, run threaded inserts or run nuts in counterbores on the bottom side. The holes for this are perpendicular to the top surface. Then to attach the plinth to the deck, there are bolts that go through it and down through the deck. These holes are perpendicular to the deck and have counterbores at the top. Think of it as bolting the deck hardware to the plinth then the plinth to the deck.
What makes all this work is that the counterbores are parallel to the bolt holes which means they are at an angle to the surface they are cut in. As a result, all bolts clamp 2 parallel flat surfaces. One of the big advantages is that the clamping force provided by the bolts across each interface is perpendicular to that interface so they don’t tend to get pulled one direction, particularly with a large angle. You can actually go to a full 90° angle change by doing this. The main disadvantage is that the material often needs to be much heavier and weight at deck level is never a good thing, especially near one end of the boat. You also either need a milling machine or counterbore bits to do this but counterbore bits are easy to get.
Eric